Application pool is the heart of a website. An Application Pool can contain multiple web sites. Application pools are used to separate sets of IIS worker processes that share the same configuration. Application pools enable us to isolate our web application for better security, reliability, and availability. The worker process serves as the process boundary that separates each application pool so that when a worker process or application is having an issue or recycles, other applications or worker processes are not affected.

In this section, I have discussed about the creation of application pools, application pool settings, and assigning an application pool to a web site.
That is all about creating a new application pool. Now let us have a look at the creation of an application pool from an existing XML configuration file.
So first of all, you need to save the application pool configuration in a server. Check the below image for details.
Application pool - IIS
Generally we do it in our production environment. The main advantages of using an application pool is the isolation of worker processes to differentiate sites and we can customize the configuration for each application to achieve a certain level of performance. The maximum number of application pools that is supported by IIS is 2000.In this section, I have discussed about the creation of application pools, application pool settings, and assigning an application pool to a web site.
How to Create an Application Pool?
Application pool creation in IIS 6.0 is a very simple task. There are two different ways by which we can create an application pool. There is a pre-defined application pool available in IIS 6.0, called "DefaultApplicationPool". Below are the two ways to create an application pool:- Create New Application Pool
- Create From Existing Configuration File
Create a New Application Pool
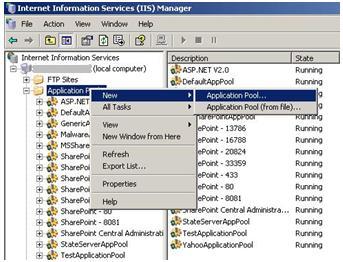
First of all, we need to open the IIS Configuration Manager. Then right click on Application Pool and go to New > Application Pool.
Create new application pool
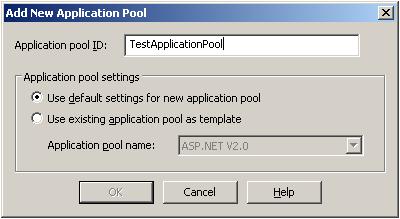
The below screen will appear, where we need to mention the application pool name.
New application pool name
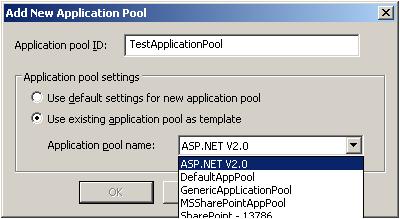
When we create a new application pool, we can use the default application setting for it. The selection of "Default Settings" means by default the application pool setting will be the same as the IIS default settings. If we want to use the configuration of an existing application pool, we need to select the section option "Use existing application pool as template". Selecting this option will enable the application pool name dropdown.
Application pool template selection
If we select an existing application pool as a template, the newly created application pool should have the same configuration of the template application pool. This reduces the time for application pool configuration.That is all about creating a new application pool. Now let us have a look at the creation of an application pool from an existing XML configuration file.
Create From Existing Configuration File
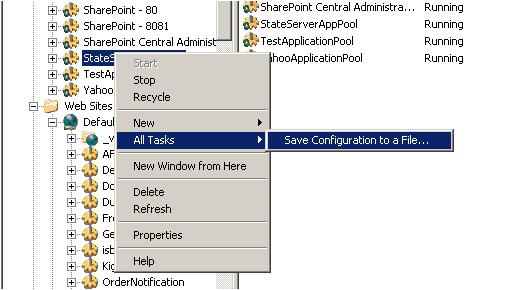
We can save the configuration of an application pool into an XML file and create a new application pool from that. This is very useful during the configuration of an application pool in a Web Farm where you have multiple web servers and you need to configure the application pool for each and every server. When you are running your web application on a Load Balancer, you need to uniquely configure your application pool.So first of all, you need to save the application pool configuration in a server. Check the below image for details.
Application pool template selection
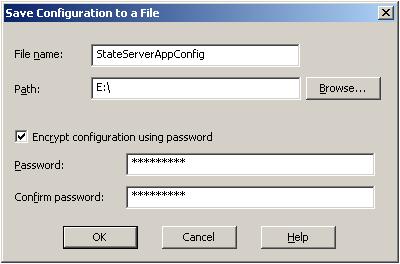
During this operation, we can set the password for the configuration file which will be asked during the import of the application pool on another server. When we click on "Save Configuration to a file", the below screen will appear.
Save configuration as XML file
Where we need to provide the file name and location. If we want, we can set a password to encrypt the XML file. Below is a part of that XML:Location ="inherited:/LM/W3SVC/AppPools/StateServerAppPool"
AdminACL="49634462f0000000a4000000400b1237aecdc1b1c110e38d00"
AllowKeepAlive="TRUE"
AnonymousUserName="IUSR_LocalSystem"
AnonymousUserPass="496344627000000024d680000000076c20200000000"
AppAllowClientDebug="FALSE"
AppAllowDebugging="FALSE"
AppPoolId="DefaultAppPool"
AppPoolIdentityType="2"
AppPoolQueueLength="1000"
AspAllowOutOfProcComponents="TRUE"
AspAllowSessionState="TRUE"
AspAppServiceFlags="0"
AspBufferingLimit="4194304"
AspBufferingOn="TRUE"
AspCalcLineNumber="TRUE"
AspCodepage="0"pre>
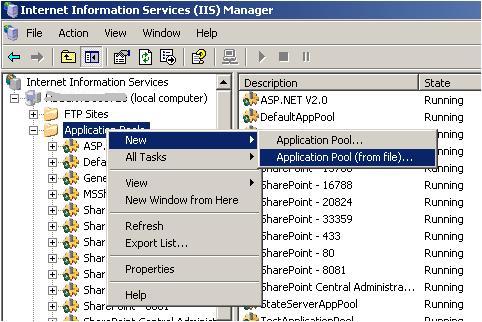
Now we can create a new application pool for this configuration file. While creating a new application pool, we have to select the "Application Pool ( From File )" option as shown in the below figure.
Application pool creation from a configuration file
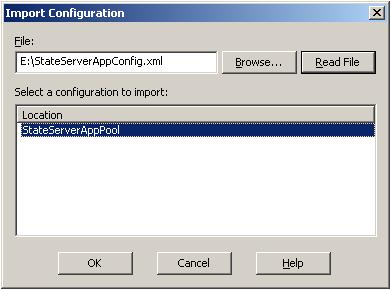
When we select this option, a screen will come where we need to enter the file name and the password of that file.
Application pool creation from configuration file
Select the file and click on the "Read File" button. This will show you the imported application pool name. Click "OK" to import the full configuration.
Application pool creation from configuration file
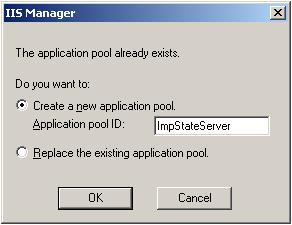
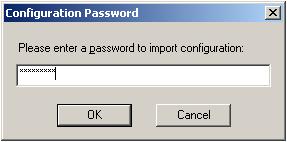
Here we need to mention the new application pool name or we can have another option where we can replace an existing application pool. For moving ahead, we need to provide the password.
Password to import application pool configuration
This is the last step for creating a new application pool from an existing configuration file
its very use ful for my carreir sir thank u very much
ReplyDeleteDot Net Training institutes in Chennai